







Landing alone is the first moment on a trip where nobody else is confirming your next move. That’s not a problem to solve with more research before you leave. It’s a sequence to run once you’re on the ground: Locate the thing you need, Advance by checking it against an official or visible signal, Navigate with the smallest useful step, and Depart once you’ve confirmed it worked, switching modes the moment it doesn’t.
Quick answer: For a calm solo arrival, pause, follow signs, keep documents accessible, and verify your first transport handoff before leaving the airport.
That’s the whole shape of it. Everything below is how to run each part of that sequence without needing to know the specific airport in advance. If the discomfort of this moment feels bigger than logistics, see the Fear & Readiness Framework for the emotional side of landing alone directly.
Before landing: prepare the arrival handoff

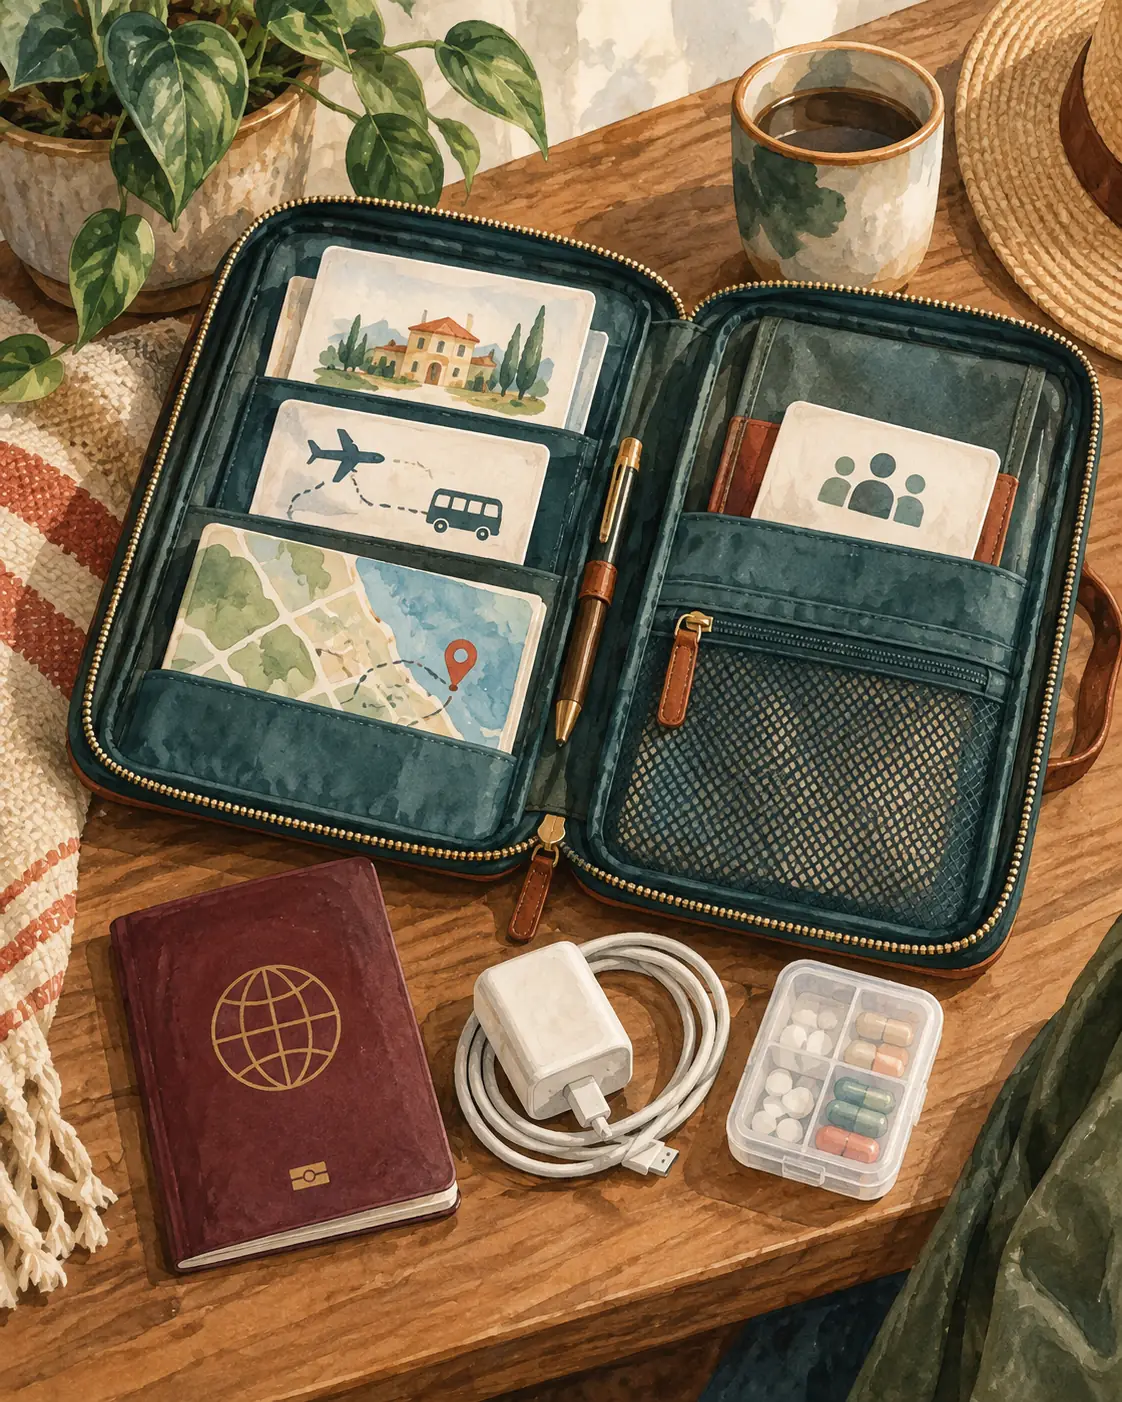
Save the accommodation address, arrival instructions, transfer plan, offline map, and trusted contact, and keep passport, charger, and medication accessible.
Prepare the next handoff before takeoff: save the address, arrival instructions, transfer plan, offline map, and a trusted contact.
Do this before you board, not after you land with a dead phone and no signal. Save your accommodation’s full address, including the entrance if it’s inside a larger complex, the name and rough location of your arrival terminal if you know it, your planned transfer method, an offline copy of the surrounding map, and one trusted contact who knows your rough arrival window.
Setting up an offline map before you lose signal covers exactly this step if you haven’t downloaded one yet.
Arrival information to save
Save the accommodation address in writing (a screenshot works), your transfer plan (transit line, prebooked car, or ride-hailing), a downloaded offline map of the arrival area, and the local emergency number if it differs from what you’re used to. None of this depends on having signal the moment you land.
What belongs in the carry-on
Keep your passport, boarding information, accommodation address, a phone charger or battery pack, and any medication accessible in your carry-on rather than checked luggage. A delayed or misrouted bag becomes a much smaller problem when the documents and contacts you need for the next few hours never left your side.
This handoff sequence is the same Map, Options, Verify, Exit logic applied to every journey after this one, not just the arrival. The MOVE Stack system for getting around on a solo trip spells out the fuller decision system it’s built on.
On arrival: orient before moving
Pause, read signs for the step underway, and ask a uniformed staff member when a sign or terminal layout does not confirm the route.
The airport becomes manageable when treated as a sequence: follow signs, complete one checkpoint, pause, then confirm the next handoff.
The instinct after a long flight is to follow the crowd. That usually works, but pausing for thirty seconds first, to actually read the signage rather than just walk toward it, prevents most of the wrong turns that happen in unfamiliar terminals. Connect to the airport’s Wi-Fi if it’s available before you start moving, since a working connection now makes every later step easier.
On my own first solo trip, I followed the arrivals crowd out of an airport in Kuala Lumpur before I’d actually read a single sign, and ended up backtracking through a hallway I’d already passed twice.
How to read airport signs
Airport signage is built around a small set of repeated symbols and words: arrivals, immigration or passport control, baggage claim, and exit or ground transportation. Follow the sign for the step you’re on rather than the one you’ll need later. Trying to read three steps ahead while walking is where most people lose the thread.
When to ask staff for help
A sign that’s unclear, a couple of minutes with no confirming sign, or a terminal layout that doesn’t match what you expected are all reasons to ask a uniformed staff member instead of continuing to guess. This isn’t a sign you’ve failed at something. It’s the fastest way to correct course, and it costs less time than backtracking on your own.
Immigration, baggage, and customs
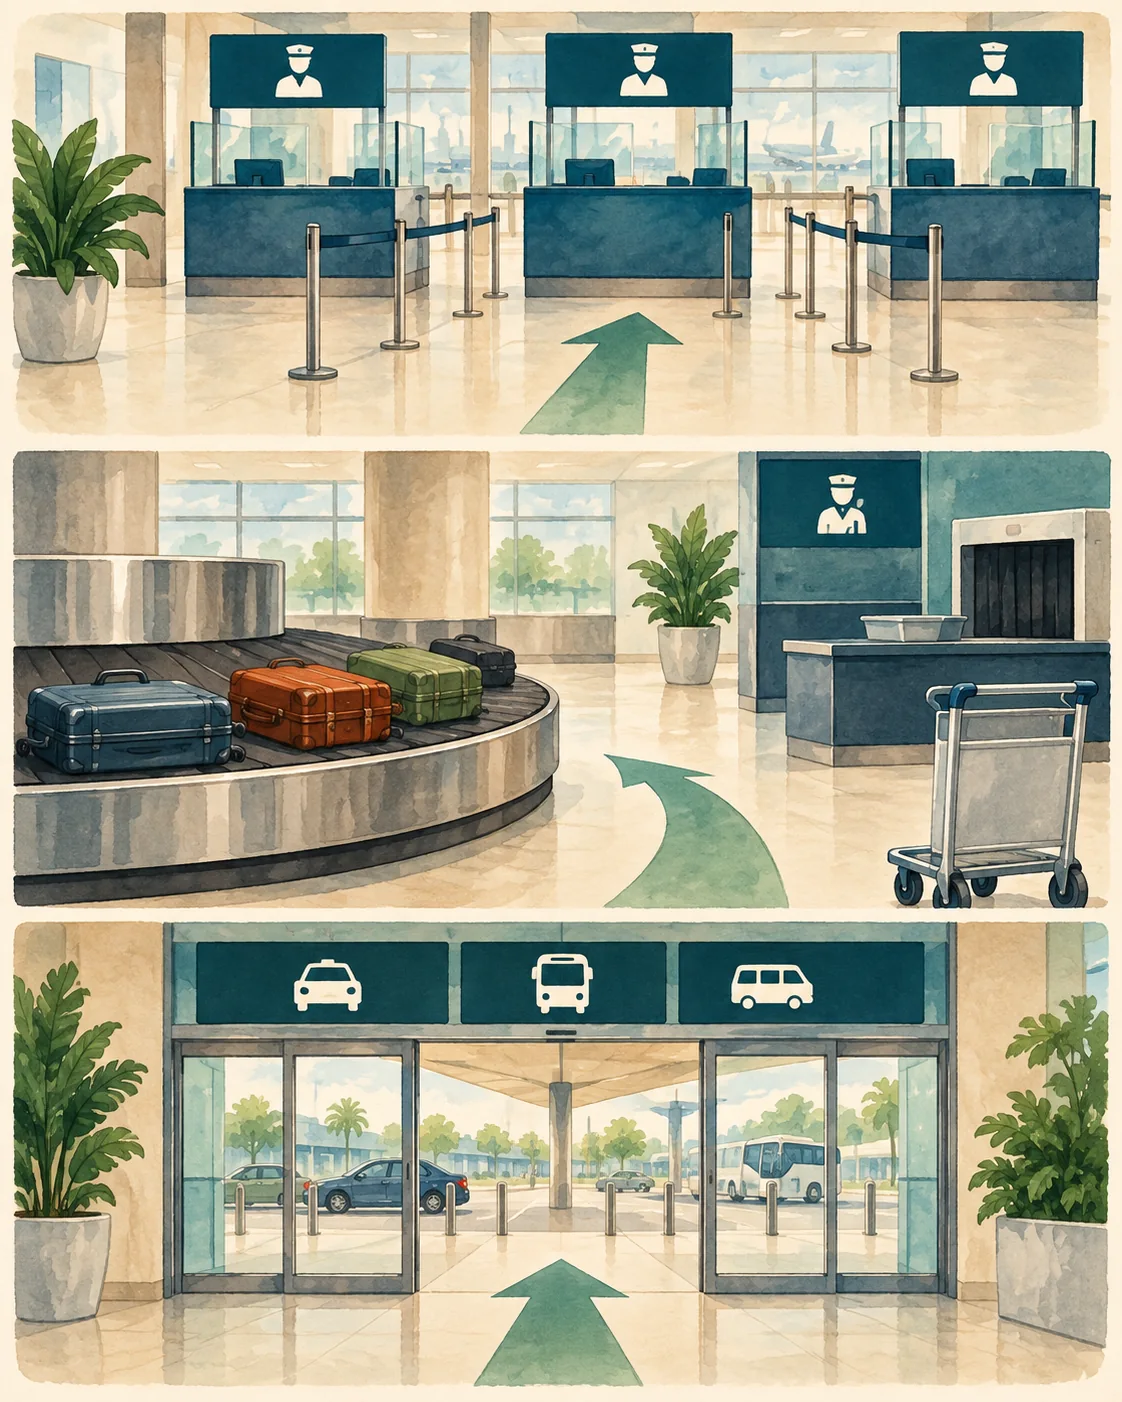
Complete immigration, collect checked baggage if needed, pass customs, then locate the correct arrivals exit for the chosen transport handoff.
Immigration, baggage claim, and customs are three separate steps, and knowing which one you’re in prevents a lot of unnecessary worry. Immigration or passport control confirms your entry, baggage claim is where you collect checked luggage, and customs is a final check before you reach the arrivals exit. Requirements at each step vary by country, so verify anything destination-specific against the relevant official government or airport source rather than a general guide.
What to keep accessible
Keep your passport, any entry documents you were told to prepare, and your accommodation address accessible through all three steps. Digging through a packed carry-on at an immigration desk adds stress that a little advance organization avoids entirely.
What to do if a bag is delayed
If your bag doesn’t appear at baggage claim, go directly to the airline’s baggage service desk, usually located near the carousels, before leaving that area. Provide your claim tag and contact details, and confirm how you’ll be reached at your accommodation. This is a routine, well-handled process for airlines, not a crisis, even though it doesn’t feel that way in the moment.
The first transport decision
How do I get from the airport to my hotel? Compare transit, a prebooked transfer, taxi, and ride-hailing by cost, luggage, time, and backup access.
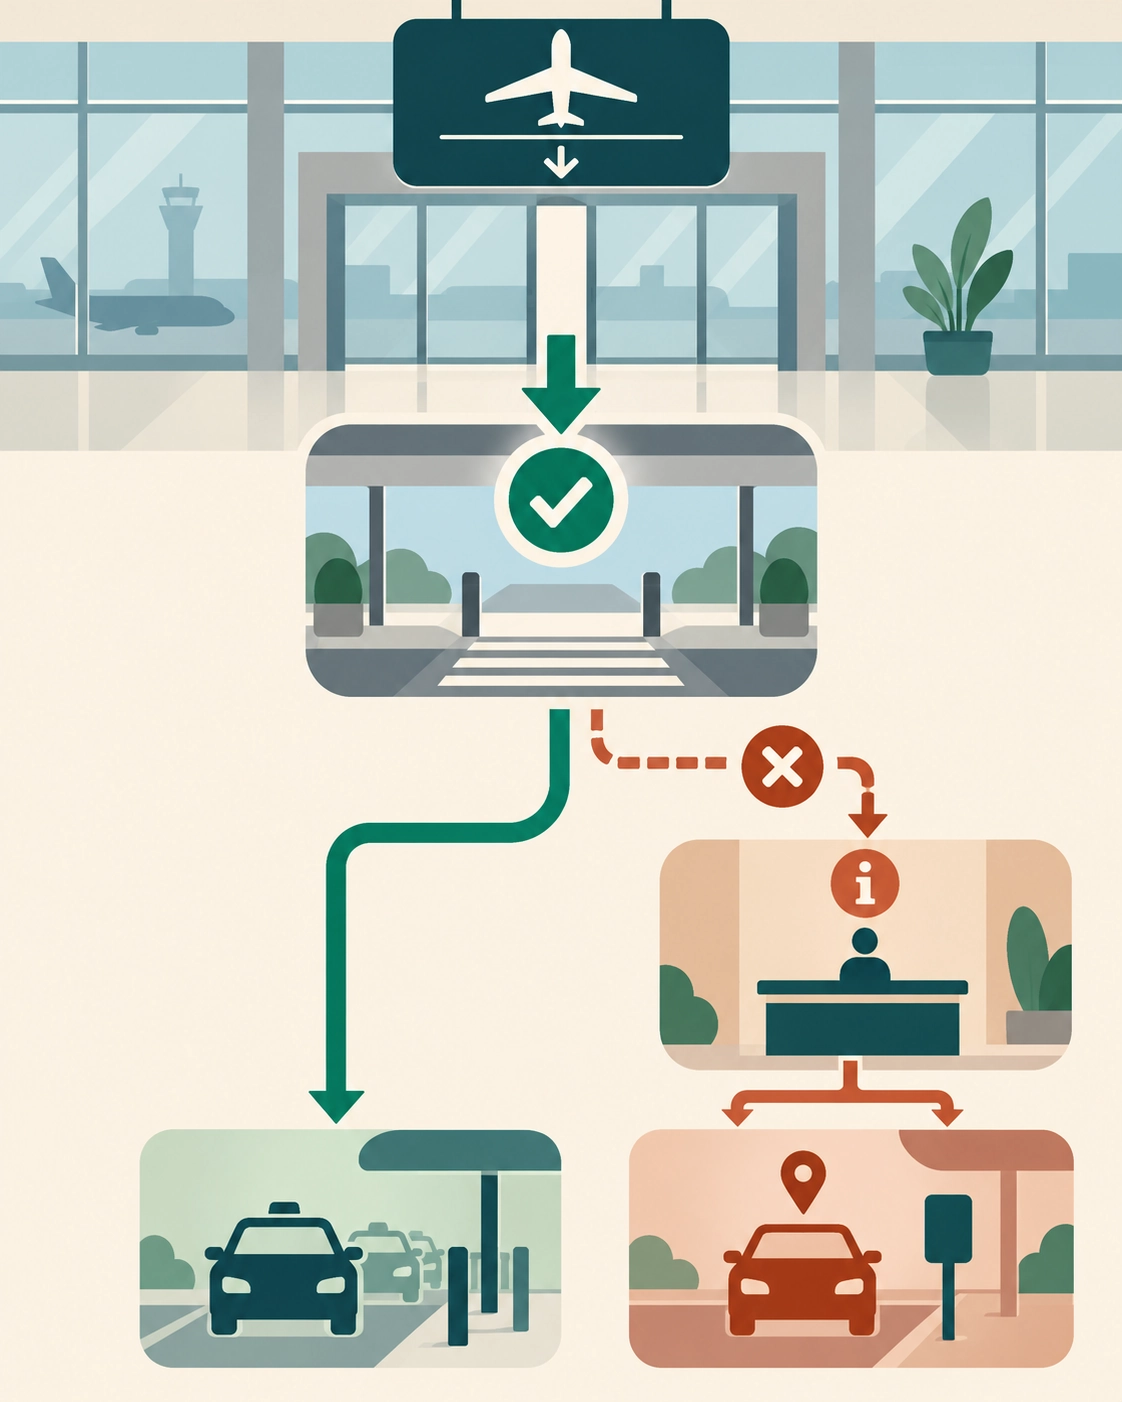
Confirm the correct ground-transport exit and meeting point; if the original option fails, use a staffed information point and switch to an official taxi queue or ride-hailing backup.
Once you’re through customs, the first real decision of the trip is how you get from the terminal to your accommodation. Confirm the correct exit for ground transportation, since airports increasingly route different transport types (official taxis, ride-hailing, public transit, prebooked transfers) through separate, clearly marked exits rather than one shared curb. For the full comparison between transit, a prebooked transfer, a taxi, and ride-hailing, comparing transfer options from the airport to your accommodation handles the decision by luggage, arrival time, and cost.
How to confirm the correct exit
Look for the ground-transportation or arrivals-exit signage rather than following the first crowd you see, since different terminals or exits often serve different transport types. If you’ve prebooked a transfer, confirm the meeting point matches what your confirmation states, not just what seems closest.
What to do when the original plan fails
If your prebooked transfer isn’t at the agreed point after a reasonable wait, or the transit line you planned isn’t running, move to a staffed information point first rather than approaching an unofficial driver. From there, switch to your backup option (an official taxi queue or a ride-hailing app) rather than repeating the same failed attempt. If you have no backup mode in mind yet, the recovery sequence for when a route fails walks through how to reorient from a stalled plan without panicking.
A small arrival checklist
Before you leave the arrivals area, run through this:
- Passport and entry documents put away securely
- Accommodation address saved and accessible offline
- Transfer method confirmed against the correct exit
- Trusted contact notified you’ve landed
- Backup transport option identified in case the first one doesn’t work
Once you’re settled in, the full transport decision matrix for a new city covers the shift from this first journey to everyday movement.
Share location and accommodation details
Once you’ve confirmed your transfer, send your trusted contact the accommodation address and your expected arrival time there. This takes under a minute and closes the loop on the “someone knows where I am” step that matters most in the first hours of a solo trip.
Use official airport help points
If anything about the arrival process feels wrong (a pickup that doesn’t match what was booked, a request for information that seems unnecessary, or feeling truly lost) stop and use an official airport information desk or staffed help point rather than continuing to improvise.
Examples
Normal case: A traveler lands, follows the arrivals signage to immigration, collects a bag at the correct carousel, and walks to the pre-confirmed ride-hailing pickup zone without incident.
Friction case: The same traveler’s checked bag doesn’t appear after twenty minutes at the carousel. Rather than waiting indefinitely or leaving, they go directly to the airline’s baggage service desk with their claim tag.
Recovery case: After reporting the bag, the traveler pauses, confirms their accommodation address is saved, and switches from their original transit plan to a ride-hailing pickup instead, since the delay has pushed them past the last scheduled train. They notify their trusted contact of the adjusted arrival time before leaving the terminal.
FAQ
How do I prepare myself for the first time flying?
Prepare the next handoff before takeoff: save the address, arrival instructions, transfer plan, offline map, and a trusted contact.
Preparation here isn’t about researching the whole trip. It’s about making sure the very next step after landing is already decided.
How hard is it to fly alone?
The airport becomes manageable when treated as a sequence: follow signs, complete one checkpoint, pause, then confirm the next handoff.
Most of the difficulty people describe comes from trying to plan the whole arrival at once instead of one step at a time.
How to not be scared to fly alone?
Replace the whole-trip worry with the next visible action, and keep a written backup for transport, lodging, and communication.
A backup plan doesn’t remove every unknown, but it removes the specific fear of having no option if the first plan doesn’t work.
What are some common solo travel mistakes?
Common mistakes include rushing after landing, relying on one connection, putting documents in checked luggage, and accepting unverified rides.
Each of these has a direct fix already covered above: pause before moving, keep a backup transfer option, carry documents with you, and verify any vehicle before getting in.
Start Building Travel Readiness
Your Free Prep System.
Not tips, not wanderlust, not “just go for it” advice.
Real systems. Honest experience. One focused email a month. Get 3 Free Tools the moment you join:
1. 60-Day Solo Travel Ready Checklist
Your complete prep timeline from decision to departure
2. First 48 Hours Arrival Survival Card
The exact protocol for landing confident, not lost
3. Booking Confidence Checklist
The tool for the moment the booking button feels impossible to press
No schedule pressure. Unsubscribe any time.
Author Box
Zisco Nueda is the solo travel educator behind Solo Travel Ready, who built the Locate, Advance, Navigate, Depart sequence used in this article after repeatedly seeing the same pattern: solo travelers arrive well-packed but under-prepared for the specific first hour on the ground, including on Zisco’s own first solo trip, when he followed the arrivals crowd in Kuala Lumpur before he’d read a single sign. Airport layouts, entry requirements, and transfer options change by destination and by date, so verify anything destination-specific against the airport’s or your carrier’s current official information before you travel.
Last updated: September 2026