







Quick Answer
Choose walking, transit, ride-hailing, taxi, or rental transport by distance, data access, cost, and arrival complexity, then save a backup route.
Every journey on a solo trip breaks down into the same four questions: where you’re starting, where you’re ending, what you can verify before you commit, and what you’ll do if the first plan doesn’t hold. The right mode changes with distance, luggage, arrival time, data access, cost, and your own comfort level. This is not a list of the best apps. It’s a repeatable system for choosing a mode, checking it before you move, and falling back to something else when it fails. Nothing in it depends on knowing the city in advance.
You don’t need to memorize every transit map in the world. You need one process you run before each unfamiliar trip.
You can manage the booking, the itinerary, the packing list. It’s the space between the airport door and the hotel key, or between one city block and the next, that feels different alone. There’s no second person to check the map over your shoulder or confirm you got in the right car. That gap is what this article closes, not with more apps to download, but with a sequence you run every time: map the route, compare the options, verify before you move, and keep an exit if it doesn’t work.
That uncertainty is not a sign you’re bad at this. Every unfamiliar journey contains several small unknowns at once (the exit you haven’t seen, the fare you haven’t paid, the language you haven’t heard), and reading all of them correctly on the first try is not a reasonable standard. Route confidence is built the same way any system is built: by running it, adjusting it, and trusting the backup when the first attempt doesn’t land.
This article gives you that system. It’s called the MOVE Stack, and it works the same way whether you’re walking three blocks from a train station or landing somewhere at midnight with no data plan yet. Once you have it, the ten guides below cover the specific pieces (airports, apps, public transit, ride-hailing, and what to do when a route fails) in more depth. You don’t need the perfect plan for every city. You need one process you can run anywhere.
If you haven’t worked through the earlier stages of the trip yet, see the step-by-step system for planning a solo trip from decision to departure for the groundwork this article builds on.
The MOVE Stack: a four-step solo-travel movement system
The MOVE Stack is a four-step decision sequence: Map the endpoints, compare your Options, Verify before you commit, and keep an Exit ready. It replaces “figure it out when I get there” with a routine you run before every unfamiliar journey.
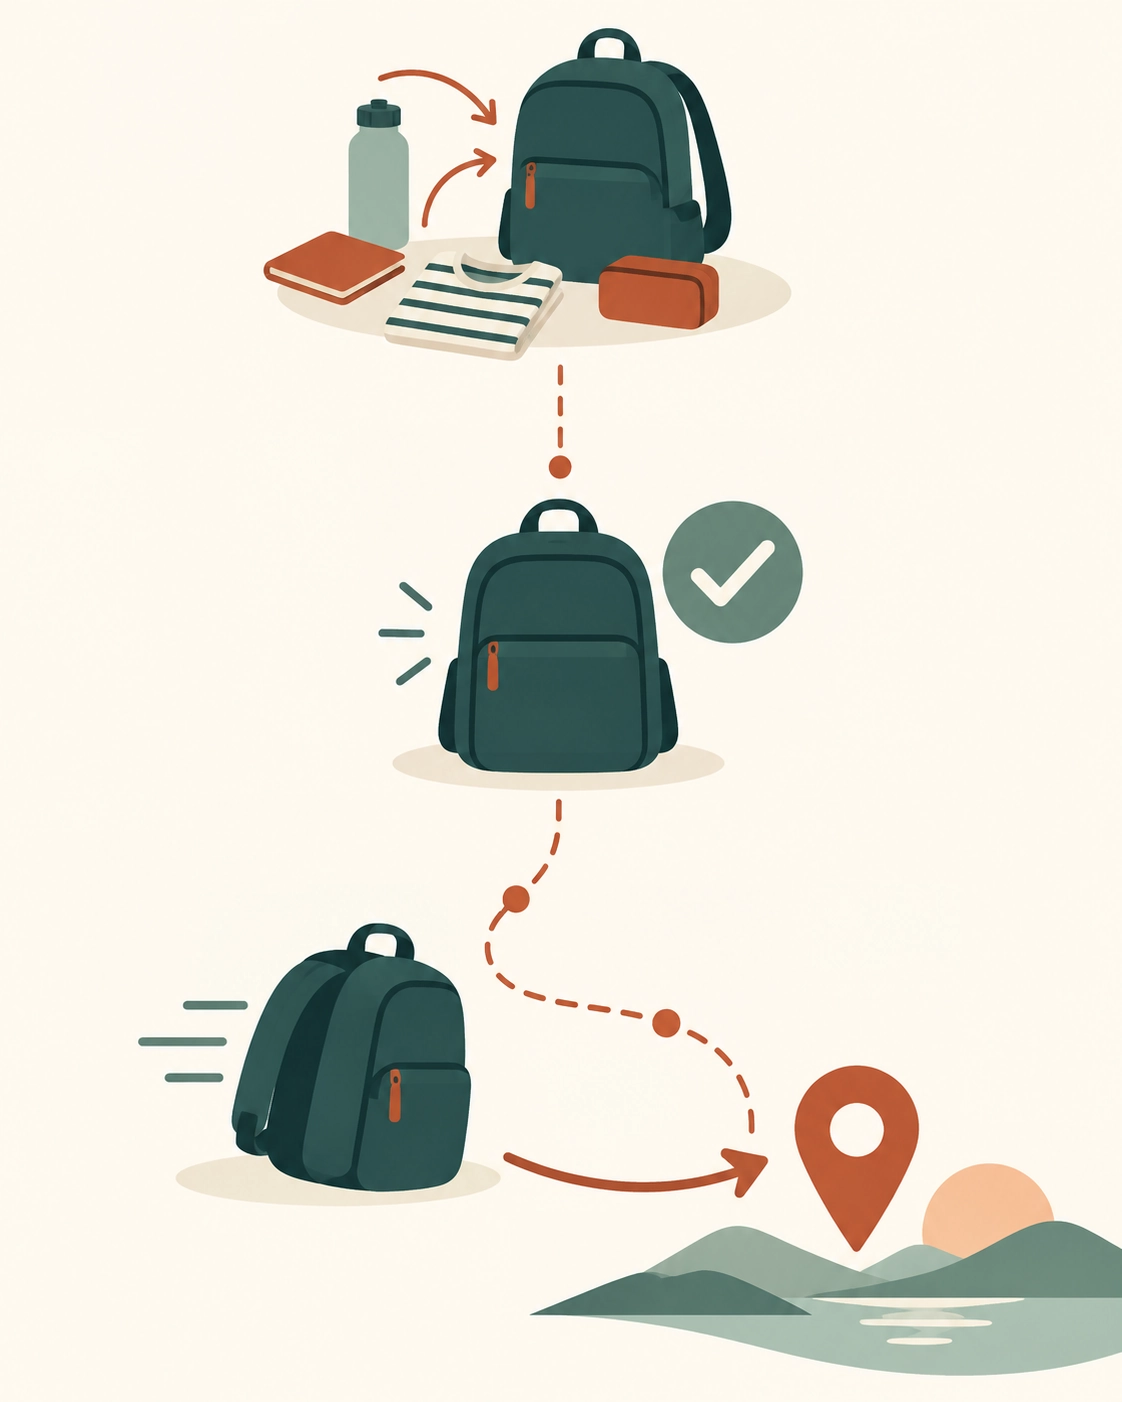
Map endpoints, compare options against conditions, verify before boarding or pickup, and keep an exit ready.
This works because it separates four decisions that usually get mashed into one panicked moment at a taxi rank or a ticket machine. Planning, choosing, checking, and recovering are four different skills, and trying to do all four at once, under time pressure, in an unfamiliar place, is where most route uncertainty comes from. Split them apart and each one gets easier. Here’s how the four steps work, and here’s how to run them: map your start and end points first, then compare your realistic options against the actual conditions of that trip, then verify the specific vehicle or route before you commit to it, and keep one exit ready in case something in the first three steps was wrong. By the end of this section, you’ll have a sequence you can run in under two minutes for any unfamiliar journey.
M: Map the endpoints and decision points
Before comparing a single option, write down (in your notes app or on paper) the exact starting point, your accommodation’s full address, the destination’s entrance if it’s a large building, any transfer points along the way, the walking segment at each end, and the latest time you can realistically arrive. This step alone prevents the most common failure: choosing a great mode for a route you haven’t actually defined.
O: Options, compared against the situation
With the endpoints fixed, compare walking, public transport, ride-hailing, a taxi, a prebooked transfer, cycling, or rental transport against the specifics of that trip: distance, how much luggage you’re carrying, cost, how much time you have, whether you’ll have data at the destination, accessibility needs, and how much uncertainty you can handle right now. The best mode for a two-block trip in daylight is rarely the best mode for a 40-minute trip after a long flight.
V: Verify before boarding or pickup
Before you get in a vehicle or board anything, confirm the operator or driver, the vehicle details, the direction of travel, the correct stop or pickup point, the fare, how the destination is spelled (transliteration mismatches cause more missed stops than any other single issue), and the final walking segment once you arrive. Save these details somewhere you can read offline, before you leave whatever connectivity you currently have.
E: Exit with a backup
Every journey needs a second option that doesn’t depend on the first one working: a downloaded offline map, your accommodation’s address in writing, a backup way to pay, a public place you can retreat to if plans change, and a second route or mode you’d switch to. A backup existing is not evidence the main plan was bad. It’s evidence the plan was complete.
Why getting around alone feels harder than it looks
Getting somewhere new alone involves more small decisions happening at once than most people expect, and there’s no second person there to catch the ones you miss. I learned that the hard way on a transfer in Southeast Asia that assumed I’d have signal to confirm the pickup point. I didn’t, and every decision I’d deferred to “figure out when I land” suddenly needed an answer at once.
What makes a route feel difficult when you are alone?
A route with a companion gets split into two attention spans: one person watches the map, the other watches the platform signs or the traffic. Alone, you’re running both jobs simultaneously, plus carrying your own luggage, plus feeling more visible if you stop to check your phone. None of that means the route is objectively harder. It means the same route takes more working memory to do alone, which is exactly what the MOVE Stack is built to reduce.
Which details deserve preparation before optional details?
Not every detail deserves equal preparation time. The endpoints (your exact start and end address, including the entrance if it’s a large building), the first transfer point, how you’ll pay, and your fallback if the first mode falls through matter more than anything else. A traveler who has those four things locked down can improvise almost everything else. A traveler who has researched restaurant reviews for the destination neighborhood but not the accommodation’s actual address has prepared the wrong 20 percent.
Plan the first airport journey
What should I choose for my first airport journey?
For the first airport journey, compare official transit, a prebooked transfer, and ride-hailing by arrival time, luggage, cost, and backup access.
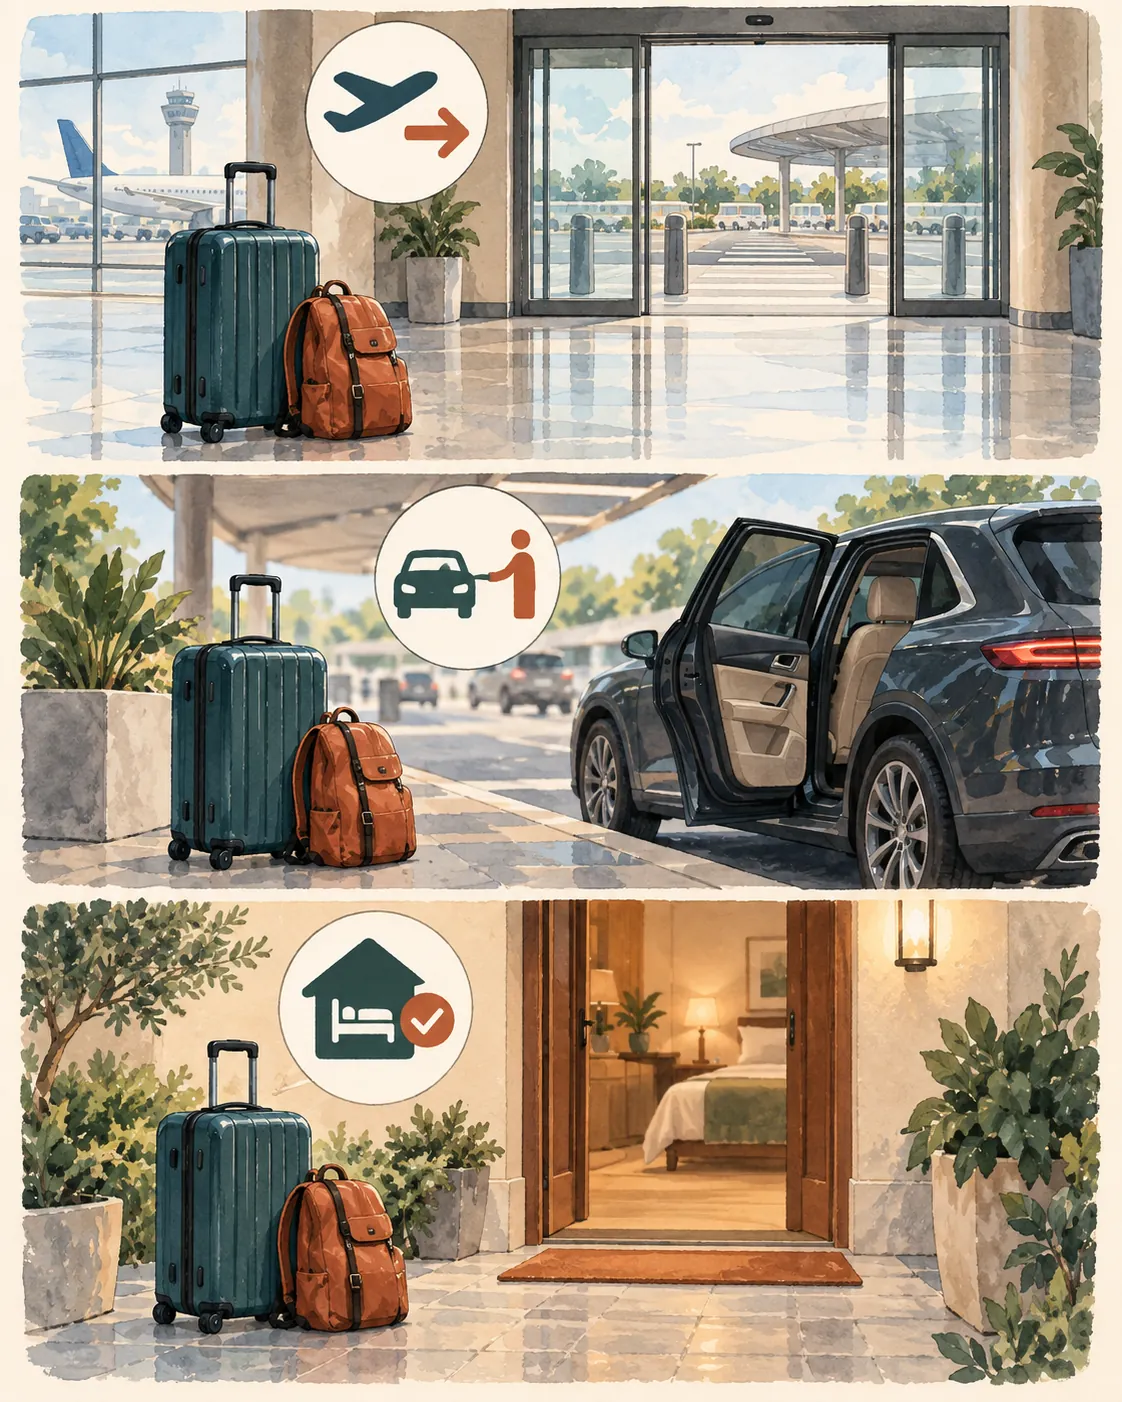
Confirm the terminal exit, official pickup or transit area, accommodation address, luggage fit, and backup before leaving the airport.
The first journey of a trip carries more decision weight than any other, because you’re making it after a flight, often with limited sleep, in a terminal you’ve never seen. Before comparing modes, locate the terminal exit, the official pickup or transit area (airports increasingly route unofficial pickups away from the terminal entirely, so check the arrivals signage rather than assuming the nearest curb is correct), and your accommodation’s exact address, including the entrance if it’s inside a larger building or complex. If you’re arriving after dark or after standard transit hours, that alone should shift you toward a prebooked transfer or ride-hailing over public transit, no matter the cost. If you want the full first-journey protocol, including terminal-specific traps and how to handle a late or delayed arrival, the first-landing sequence for a solo arrival walks through the complete sequence.
Luggage changes the calculation more than most travelers expect. A single backpack keeps every option open, including a longer walk to a transit stop. Two checked bags and a personal item make public transit with multiple transfers a genuinely worse choice even when it’s cheaper, because a missed connection or a station without elevators turns a manageable delay into a real problem. Once you’ve compared the arrival-time and luggage variables, the actual transfer decision (transit line versus prebooked car versus on-arrival ride-hailing) is covered in comparing transfer options from the airport to your accommodation, which walks through the fare and timing comparison for each.
Choose a city movement mode
How do I get around without a car?
Use walking, public transit, ride-hailing, taxis, or cycling; compare time, cost, safety, and data access before choosing the route.
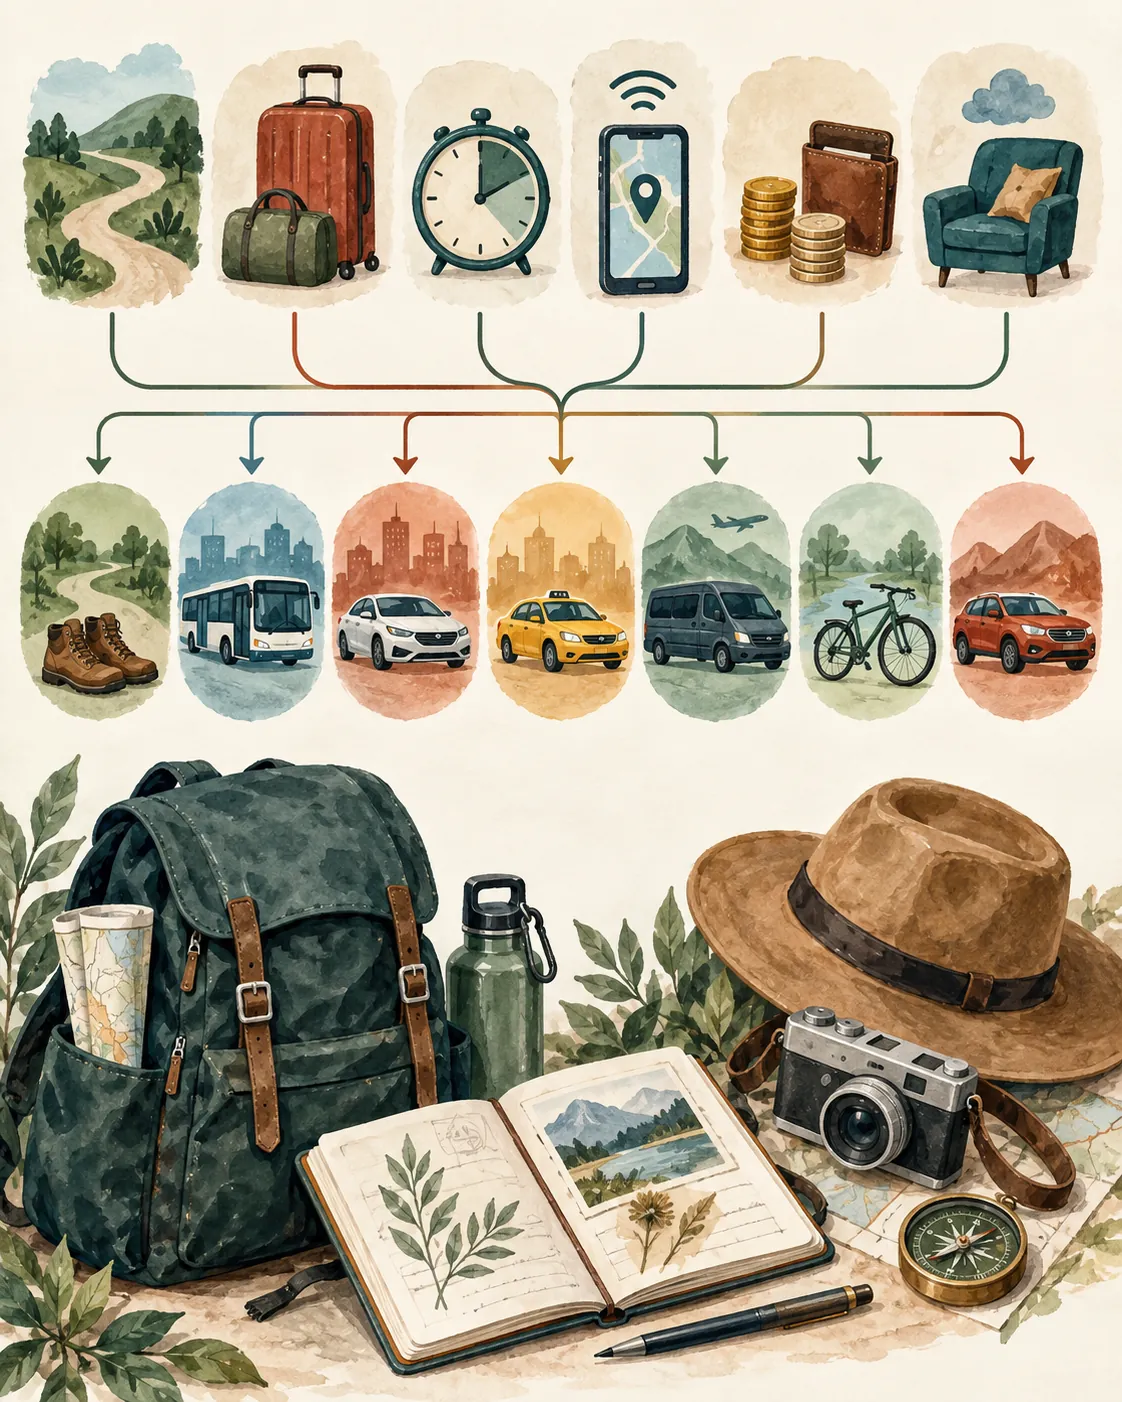
Choose walking, transit, ride-hailing, taxi, transfer, cycling, or rental transport by the journey's distance, luggage, time, data access, cost, and comfort.
Once you’re past the first arrival journey, day-to-day movement in an unfamiliar city comes down to five real options: walking, public transit, ride-hailing, taxis or a prebooked transfer, and cycling where it’s available and comfortable. None of these is universally correct. Walking wins for anything under 20 minutes in daylight with no luggage. Public transit wins for predictable, well-mapped routes where the schedule matters less than the cost. Ride-hailing wins when you’re carrying anything heavy, traveling after dark, or need a door-to-door route you can verify before you get in. A taxi or prebooked transfer wins when card payment or app access is unreliable at your destination, which happens more often in smaller cities than most guides admit.
Weather, time of day, and how much uncertainty you’re carrying that day all shift the decision even when the distance stays the same. A 15-minute walk that’s fine at 2pm is a different decision at 11pm in a poorly lit area, and there’s no failure in choosing the paid option on a day when your instincts say to. For the full decision matrix by distance, density, and time of day, the full transport decision matrix for a new city breaks down each mode against real conditions rather than a single ranked list.
If public transit is your default, navigating public transit safely on your own sets out ticket systems, platform verification, and what to do if you board the wrong direction.
Build the offline navigation stack
How do I use Google Maps offline?
Download a Google Maps area before departure, save your accommodation, and keep screenshots or a written address for the final route.

Download the relevant map area, save the accommodation address, keep screenshots or a written address, retain payment backup, and preserve battery.
Before you leave reliable Wi-Fi or mobile data, download the relevant area in Google Maps (or your preferred offline-capable map app) covering your accommodation, the airport or station, and the general district you’ll be moving through. This takes a few minutes and works without any signal once it’s saved. Pair the downloaded map with a written or screenshotted version of your accommodation’s address in the local script if it differs from your own alphabet, since typed addresses in unfamiliar character sets are one of the most common points where a driver, a map app, and your own memory all disagree. Setting up an offline map before you lose signal covers the full setup, including how far in advance to download and how to keep the map current if your route changes.
What should I save before leaving Wi-Fi?
Before you lose connectivity, save your accommodation’s address, the airport or station layout if you have it, a local transit map, your emergency contact information, and a written version of your destination address that doesn’t depend on autocomplete or a live connection. A screenshot works as well as a downloaded map for most of these, and takes less time to set up. For a full comparison of offline-capable navigation apps beyond Google Maps, including which ones work best with no data at all, comparing offline-capable navigation apps explains the options and their tradeoffs.
Verify transport before boarding or pickup
What’s safer, bus or Uber?
Neither is always safer; compare official pickup details, operating hours, route visibility, payment, and your comfort before choosing.
There’s no universal answer to whether a bus or a ride-hailing car is the safer choice, because the honest answer depends on conditions you can actually check, not on the mode itself. Before boarding or getting into a vehicle, confirm the vehicle’s plate number and driver details against what the app shows you, choose a pickup point in a lit, public area rather than accepting a pickup at an isolated curb, check that the route on the app roughly matches what you’d expect for the destination, and confirm you have a way to pay that doesn’t leave you stranded if a card is declined. For public transit, check the operating hours before you rely on the last scheduled service, and know your exit stop before you board rather than tracking it live the entire ride. If you want app-specific safety features and how to compare providers where more than one operates in the same city, comparing ride-hailing apps and their safety features addresses the direct comparison.
Compare total cost before choosing
What is the cheapest method of transportation?
The cheapest option depends on the city and distance; compare walking, transit, shared rides, and taxis after checking total time and fees.
The fare on the screen is rarely the full cost of a journey. A single ride-hailing trip that looks expensive next to three linked transit fares can end up cheaper once you count the transfer time, the risk of a missed connection, and the mental cost of navigating multiple platforms while tired. Walking is usually cheapest in dollars and most expensive in time and physical energy, which matters more after a long travel day than it does on a rested morning. Before choosing the cheapest option on paper, add up the total journey time, the number of decision points where something could go wrong, and what a wrong turn would actually cost you in a worse situation, not just an average one.
Transport is one line in a larger trip budget, not a decision made in isolation from it. See The money system for budgeting a solo trip for how to weigh a transport choice like this one against the rest of what you’re spending.
Recover when the route fails
A route failing (a wrong stop, a canceled ride, a dead phone) is not evidence your plan was wrong. It’s the exact situation the fourth step of the MOVE Stack, the exit, exists for.
Stop before you improvise

Move to a public staffed place, preserve battery and data, check saved backups, verify the position, and switch to a workable route or mode.
The instinct when a route goes wrong is to keep moving and figure it out on foot. Resist that. Move to a public, staffed location first (a station office, a shop, a hotel lobby) and preserve whatever battery and data you have left before making a new decision. A wrong turn made while standing still costs nothing. A wrong turn made while walking costs distance you’ll have to retrace.
Reorient, verify, switch
Once you’re somewhere stable, check your saved offline map and written address, ask a staff member to confirm your location if you’re unsure, and then switch to your backup mode or route rather than repeating the one that just failed. If the same approach didn’t work once, running it again with more urgency rarely changes the outcome. The recovery sequence for when a route fails shows this exact sequence in more depth, including what to do if you have no data at all.
Re-routing between two points without starting over maps out the process for a route that isn’t working even though you know where you are.
For situations where you’ve lost data entirely rather than just one route, the full offline fallback stack for a dead phone or no signal runs through more detail.
Examples and Experience
Maya lands late with luggage. Maya’s flight arrives after midnight with two checked bags and a connecting flight’s worth of fatigue behind her. Her instinct is to look for the cheapest transit option, but the MOVE Stack’s Options step flags the late hour and the luggage as reasons to shift toward a prebooked transfer or an official airport taxi instead. She’s already saved her accommodation’s address offline, so even if the transfer runs late, she has the written address ready for a backup ride-hailing request, and she keeps the transit map as a daylight-only fallback rather than a real option tonight.
Jake optimizes a dense-city day. Jake has six stops planned across a compact downtown grid and defaults to comparing app ratings before choosing anything. Running the Options step instead, he compares walking, transit, and ride-hailing by actual time and fare for each specific leg rather than picking one mode for the whole day. Two legs turn out faster on foot than any app suggested; one long cross-town leg is faster by transit despite an extra transfer. The system, not the app count, drives the decision.
Robert loses data before a station transfer. Robert’s phone drops signal mid-transfer in an unfamiliar station, right as he needs to confirm his next platform. Following the recovery sequence, he moves to the staffed ticket window first rather than wandering the platforms, uses his offline-saved map to confirm the general direction, and asks staff to verify the platform number before committing. The backup mode he’d noted before leaving Wi-Fi (a second bus route serving the same destination) stays available if the platform he needs turns out to be delayed.
Comparisons
| Mode | Best use | Cost pattern | Time predictability | Data dependence | Luggage fit | Verify before you go |
|---|---|---|---|---|---|---|
| Walking | Under 20 minutes, daylight, light bags | Free | High, but weather-sensitive | Low if map is saved | Poor with more than a day bag | Route and lighting along the way |
| Public transit | Predictable, well-mapped routes | Low | Medium, depends on schedule accuracy | Medium, offline maps help | Poor to fair, depends on transfers | Direction, stop, and operating hours |
| Ride-hailing | Door-to-door, after dark, heavier bags | Medium to high | High once matched | High, needs live data at pickup | Good | Plate, driver, and route on the app |
| Taxi or prebooked transfer | Unreliable card or app access, late arrivals | Medium to high | High | Low once booked | Good | Fare, operator, and pickup point |
| Cycling | Available bike infrastructure, moderate distance | Low | Medium, traffic and weather dependent | Low if route is saved | Poor | Route safety and bike condition |
For the specific bus-versus-ride-hailing decision travelers ask about most, there’s no universal winner. A bus wins when the route is direct, runs frequently, and you can verify the stop and direction in advance. Ride-hailing wins when the route requires multiple transfers, you’re arriving after service hours, or you’re carrying more than you can comfortably manage between stops.
Checklists and Tables
Before you leave:
- Endpoint addresses (start, transfer, destination, and its entrance if it’s a large building)
- Primary mode chosen against distance, luggage, time, and data access
- Backup mode identified for the same route
- Accommodation address saved offline
- Offline map area downloaded
- Payment route confirmed, including a backup if a card fails
- Phone battery checked
- Operating hours confirmed if relying on scheduled transit
- Final walking segment noted at both ends
Before boarding or pickup:
- Operator or driver confirmed against the app
- Vehicle details matched
- Direction of travel confirmed
- Correct stop or pickup point identified
- Fare confirmed
- Destination spelling checked against what you’ll show the driver or type
- Exit point at the destination identified
- Next decision point already in mind
Mistakes to Avoid
Choosing by app popularity instead of journey conditions
Picking a mode because an app has the most downloads or the highest rating skips the actual comparison this trip needs. Run the Options step of the MOVE Stack instead: compare distance, luggage, time, data access, and cost for this specific journey, not for travel in general.
Planning only the first route
A route with no backup works fine right up until it doesn’t. If the only plan is “take the train,” a canceled service or missed connection leaves you improvising from zero. Fix it with an exit plan: a second mode or route identified before you leave, plus a public place to stop if the first attempt fails.
Saving an attraction but not the accommodation
Travelers often download offline maps or bookmark the places they’re excited to visit, then realize mid-trip they never saved the one address they’ll need every single day: where they’re sleeping. Fix it by saving your endpoints, including the final walking segment, before you save anything else.
Treating “cheapest” as “best”
The lowest fare on the screen doesn’t account for transfer time, the risk of a missed connection, or how much a wrong turn costs when you’re tired. Fix it by comparing total journey cost, not just the ticket price: time, transfers, fees, and the stress load of the route.
Accepting a pickup or vehicle without verification
Getting into the first car that pulls up, or boarding the first bus that looks roughly right, skips the one step that catches most transport problems before they happen. Fix it with the Verify step: confirm the operator, vehicle, direction, and destination spelling before you commit, every time, even on a route you’ve already run once.
Summary
- Map your endpoints, including the final walking segment at each end, before comparing any options.
- Compare modes against this journey’s actual conditions: distance, luggage, time, data access, and cost.
- Verify the operator, vehicle, direction, and destination before boarding or getting in.
- Save an offline map and a written backup address before you lose connectivity.
- If a route fails, move to a public place first, then reorient and switch to your backup rather than repeating what didn’t work.
Confidence on unfamiliar routes doesn’t come from knowing every city in advance. It comes from having a backup sequence you trust enough to use.
FAQ
How can I get around without a car?
How do I get around without a car? Compare walking, transit, ride-hailing, taxis, and cycling by distance, cost, time, and data access.
Most cities solo travelers visit have workable alternatives to driving. The right one for a given trip depends on the situation rather than a single best answer: compare the modes against your actual distance, luggage, and schedule for that day instead of defaulting to whichever one worked in a different city.
How can I get around if I can’t drive?
How can I get around if I can’t drive? Choose walking, public transit, taxis, ride-hailing, or cycling based on distance, cost, time, and access.
Not driving doesn’t limit your options as much as it might seem. Accessibility and local operating conditions vary by city and by transport provider, so it’s worth verifying step-free access, boarding assistance, or vehicle type for the specific route before you rely on it, rather than assuming every option in every city works the same way.
What is the cheapest method of transportation?
What is the cheapest method of transportation? Usually walking or public transit costs least, but compare fares, transfers, and the time required.
Fare price alone doesn’t tell the full story. A cheaper option that requires two transfers and more walking time can end up costing more in fatigue and risk than a slightly pricier direct option, particularly right after a long travel day.
Is a bus or Uber safer?
Is a bus or Uber safer? Neither is always safer; verify the vehicle, pickup, route, payment, operating hours, and your ability to exit.
Safety here comes from what you can verify in the moment, not from the mode itself. A well-lit bus stop with a confirmed route can be a safer choice than a ride-hailing pickup at an isolated curb, and the reverse is just as often true.
How do I get from the airport to my hotel?
How do I get from the airport to my hotel? Compare transit, a prebooked transfer, taxi, and ride-hailing by cost, luggage, time, and backup access.
The first journey of a trip deserves more preparation than any other single leg, because you’re making the decision tired, in an unfamiliar terminal, often without local currency sorted yet. The airport-to-hotel comparison covered earlier in this article walks through the full decision once you land.
Conclusion and Next Step
Right now, every unfamiliar journey probably feels like its own fresh test: a new city, a new set of unknowns, a new chance to get something wrong. The MOVE Stack changes that. Once you’ve run it a few times, mapping endpoints, comparing options, verifying before you commit, and keeping an exit ready, it stops being a conscious checklist and becomes the way you move through any city, familiar or not.
Within the next 24 hours, do one thing: open a map app, download the area around your accommodation and the airport or station you’ll arrive at, and save the accommodation address somewhere you can read it without a connection. That single step closes the gap between “I’ll figure it out when I land” and “I have a backup already saved.”
From here, the next layer depends on what’s ahead of you first. If you’re planning your arrival, see how to handle the first hour after you land for the full sequence.
If your route planning is more about the days after you land instead, building your offline navigation stack is the natural next system to build. You don’t need every piece of this cluster before your trip. You need the MOVE Stack and whichever single guide matches what’s happening next.
Resources for Getting Around
Apps and tools
- Google Maps: supports offline area downloads for navigation without a live connection; the default starting point for the offline stack in this article.
- Uber: ride-hailing with in-app driver and vehicle verification, available in many but not all of the cities this cluster covers.
- Local transit authority apps: vary by city. Check the specific transit operator’s own app or website rather than a third-party aggregator for live schedule accuracy.
Official resources
- Destination-specific airport and transit authority websites: confirm operating hours, official pickup zones, and current fares directly with the operator before you travel, since these change more often than general guides can track.
- Your accommodation’s own arrival instructions, if provided, which often include the most current local transfer advice available.
Start Building Travel Readiness
Your Free Prep System.
Not tips, not wanderlust, not “just go for it” advice.
Real systems. Honest experience. One focused email a month. Get 3 Free Tools the moment you join:
1. 60-Day Solo Travel Ready Checklist
Your complete prep timeline from decision to departure
2. First 48 Hours Arrival Survival Card
The exact protocol for landing confident, not lost
3. Booking Confidence Checklist
The tool for the moment the booking button feels impossible to press
No schedule pressure. Unsubscribe any time.
Author Box
Zisco Nueda is the solo travel educator and preparation-systems designer behind Solo Travel Ready, based partly in Southeast Asia, where the gap between “the app says this route works” and “this route actually works” shows up more often than most travel advice admits. The MOVE Stack came out of repeatedly hitting the same failure point on unfamiliar routes: a plan that assumed one detail that didn’t hold on the day, a transfer that assumed a signal to confirm the pickup point, and didn’t, somewhere in Southeast Asia. Zisco’s approach across Solo Travel Ready treats preparation as what makes flexibility possible, not what replaces it, and this system reflects that: a route that fails is not proof the plan was wrong, only proof the backup step exists for a reason. This article reflects the site’s practical-systems scope and does not substitute for current, destination-specific transport or safety information, which changes by city and by season.
Last updated: September 2026